Data Management Workflow
This section will guide you through a workflow on how to manage data. In addition, it will allow you to understand concretely the groups and users roles introduced in the previous section.
Let us start with a concrete example to understand better the workflow.
Remember that:
- a writer can view, add, and edit features of the corresponding group;
- a publisher can view and publish features of the corresponding group.
Suppose that the team consists of three members:
- user_001: belongs to Fungus_Writer group.
- user_002: belongs to Animal_Writer, Plant_Writer, Fungus_Publisher groups.
- user_003: belongs to Animal_Publisher, Plant_Publisher groups.
Adding Features
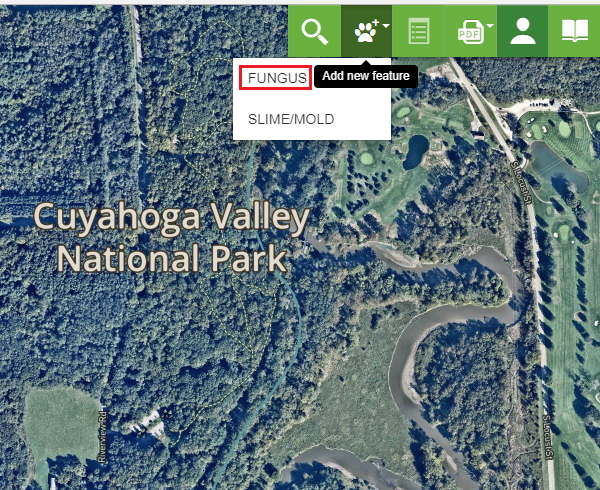
Walking around the Cuyahoga Valley National Park and equipped by a Tablet-GPS, user_001 detects a Fungus specie. In order to register the observation, he will:
Log in in the portal. From the top toolbar, Click on the Add new feature list menu then on Fungus.
Place the marker on the map. A form will open automatically.
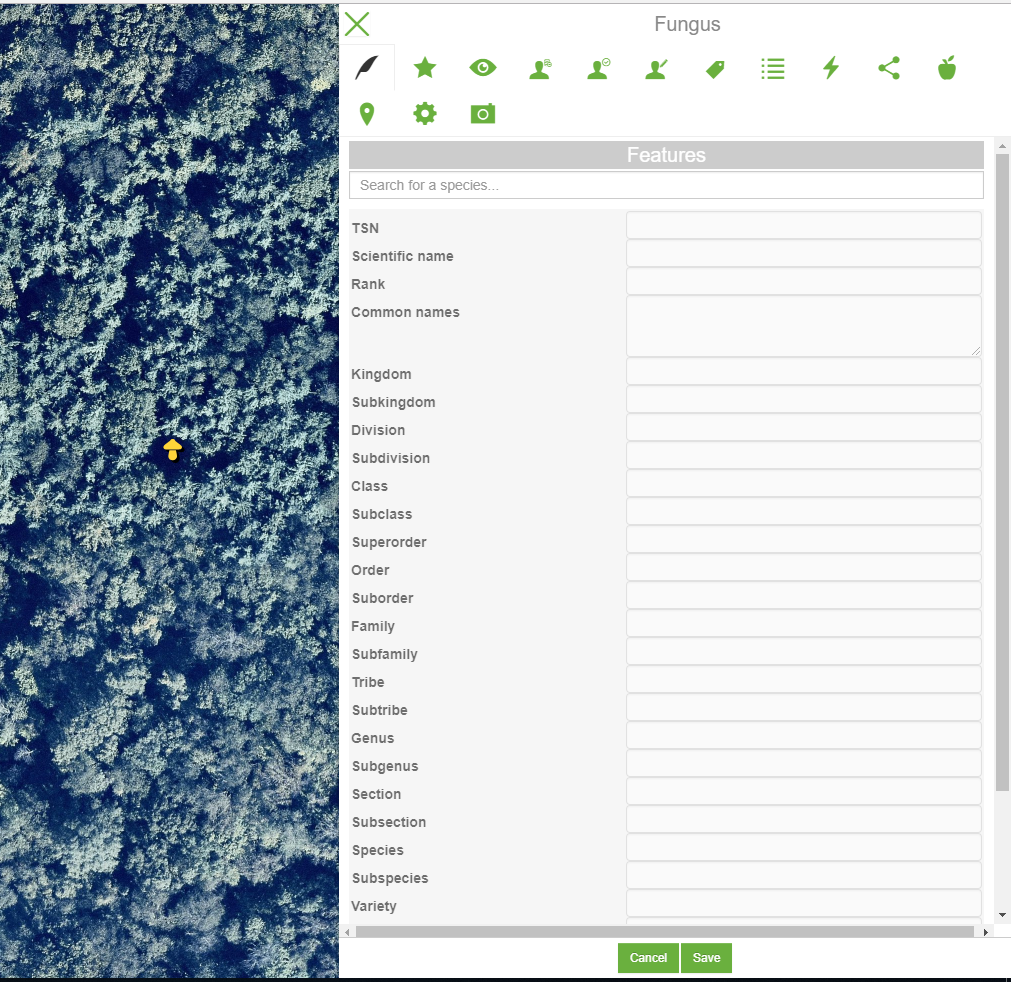
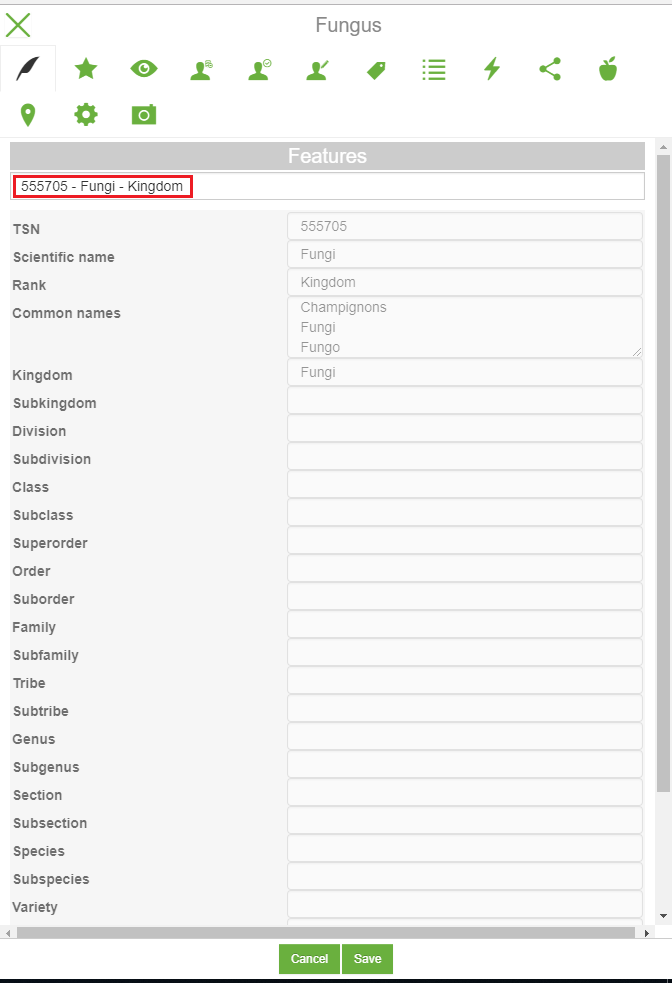
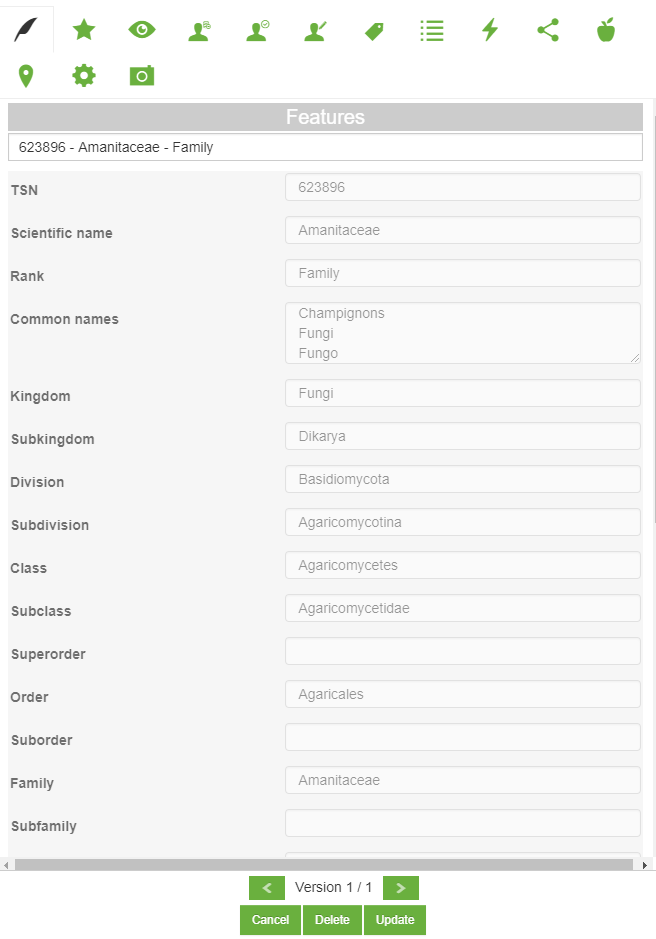
The first page is required and contains informations about the specie and must be filled by searching the specie from the Search bar. Since user_001 is not an expert, will Search the kingdom Fungi then Click on it. All the field till the Kingdom field will be extracted and filled automatically from the database. The second page contains further informations on the element status.
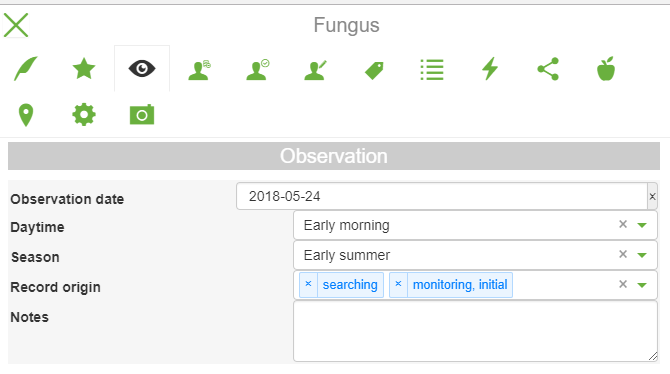
On the third page, Fill the Observation date and time.
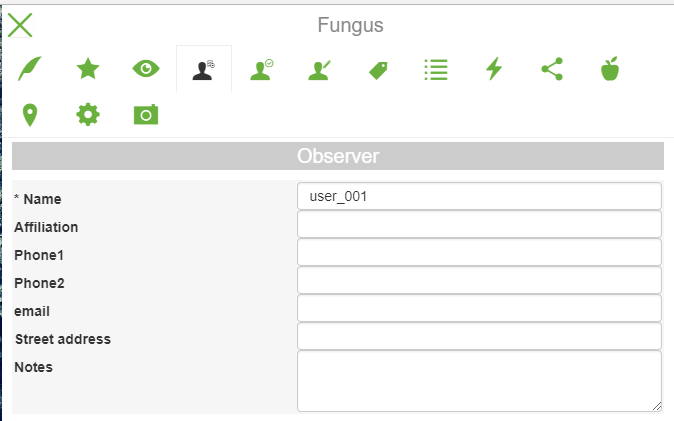
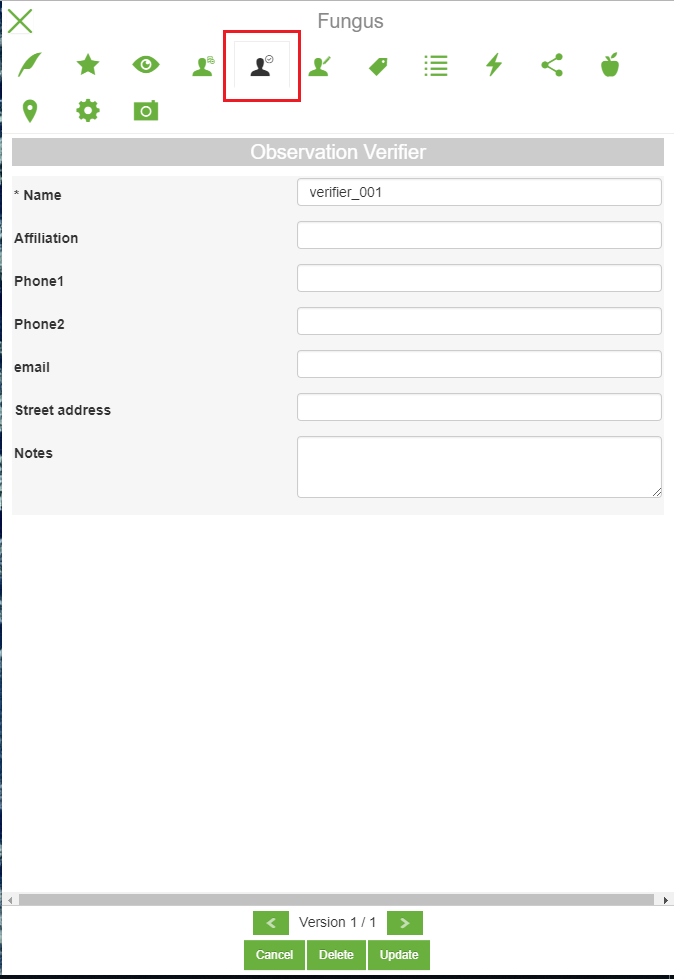
The Observer page is required and contains the personal details of the observer. The next page is reserved to the verifier and will be treated later.
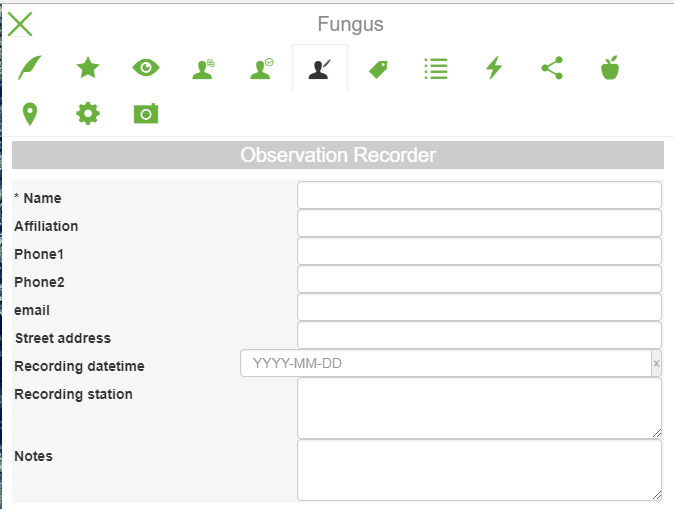
The Observation Recorder page should be filled by the observer indicating if he used a Recording station for example. The next five pages contain detailed informations about the status of the observation and the surrounding environment, you can check them by yourself.
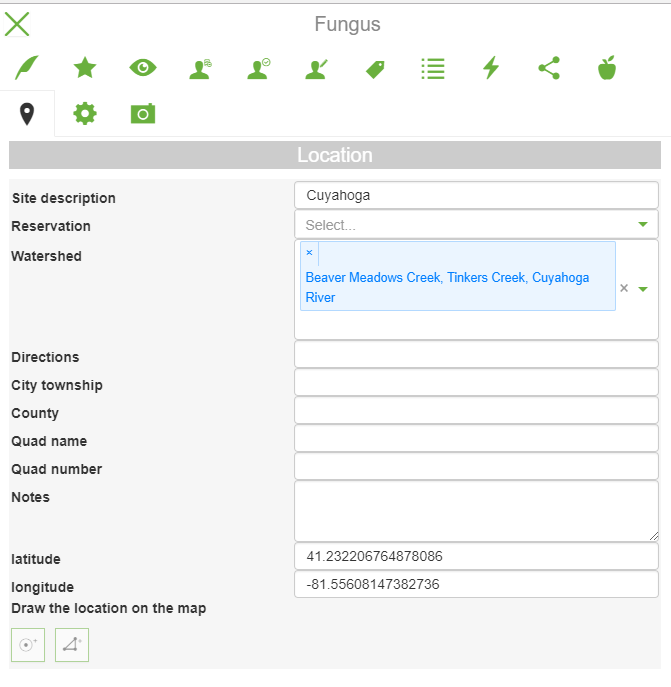
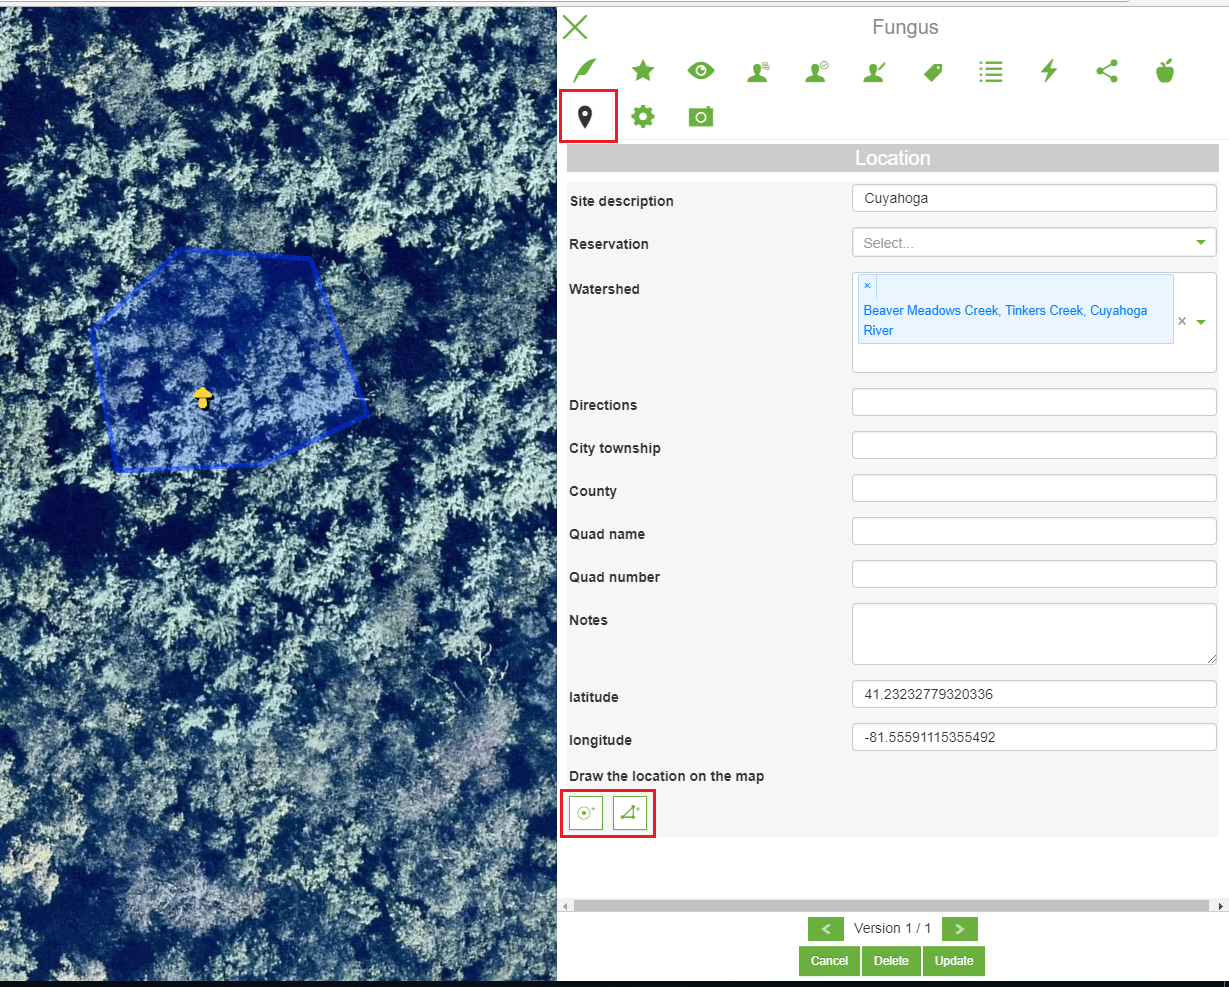
Fill the Location by providing the site name and other informations.
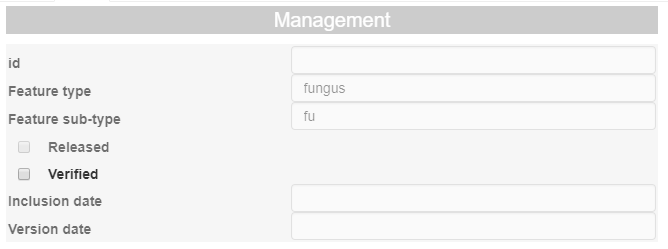
The management page allows to verify the feature and if a publisher to released it. It will be treated in the sequel.
On the last page, Upload an image of the observation.
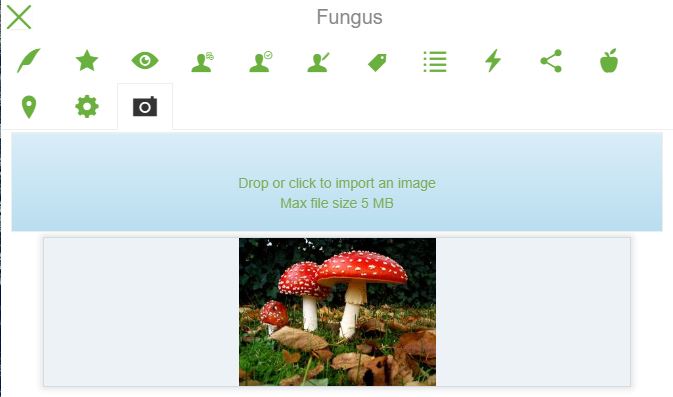
Click on Save to save the observation.
Editing Features
Once at the office, user_001 shows the details and the image of the observation to an expert (Verifier) and the latter provided him with further detailed informations. From his desktop, he will:
Log in then Click on the Marker. The info page will open. Click on Edit.

On the first page, Search from the database the Family name provided by the verifier then Add it.
Navigate to the Observation Verifier and Fill the form.
After that, user_001 decides to edit the location since it is not accurate due to bad signals of the GPS for example. Navigate to the Location page then Use one of the tools at the bottom to move the marker or to draw an polygon to delimit the area.
Now that the feature is verified. Navigate the Management page then Check the Verified box then Update.
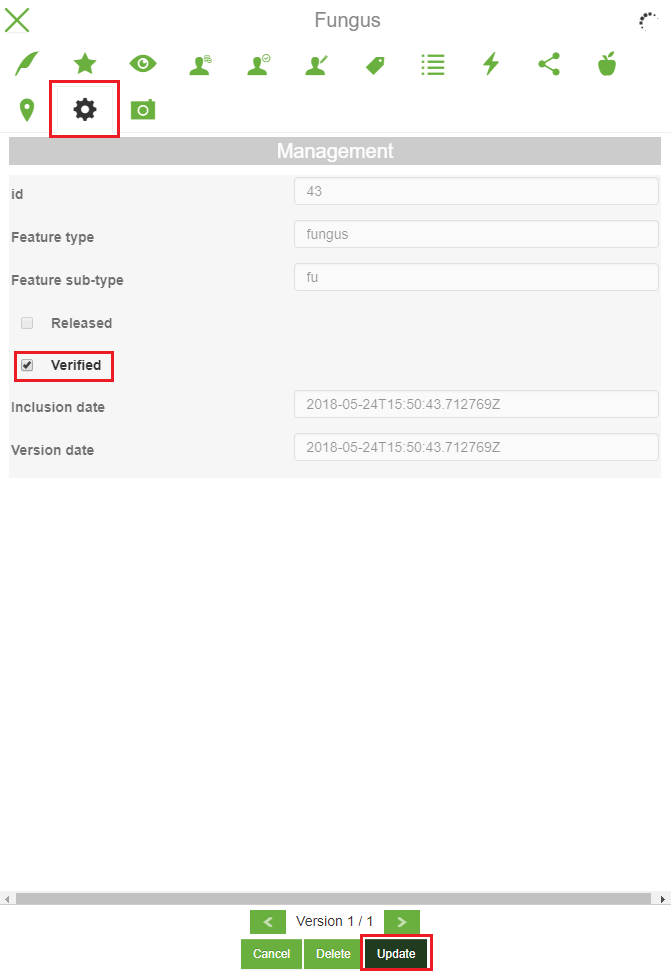
At this point, after an editing session a new version will be created but still unpublished.
Finally, he will be also able to Save a Permalink to the clipboard corresponding to the current stage of the feature.

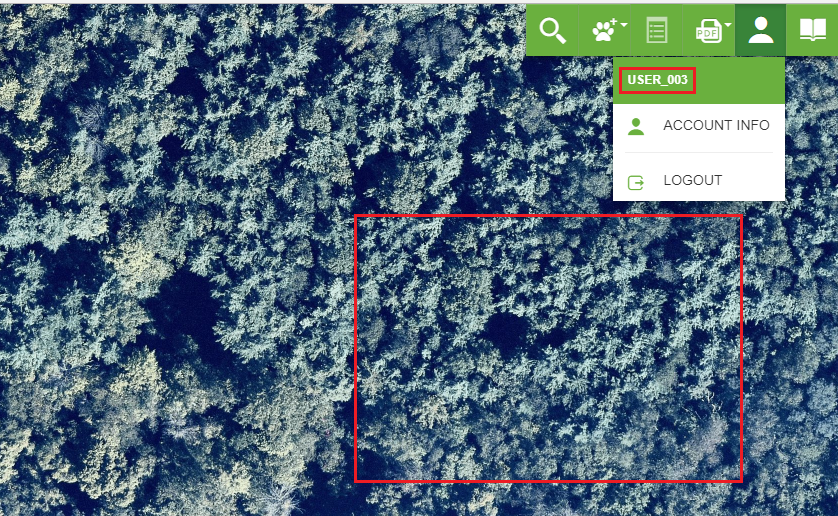
Now, user_003 belongs to other category groups (different from the Fungus category), if logged in will not see the fungus added by user_001 since it is not published yet.
Publishing Features
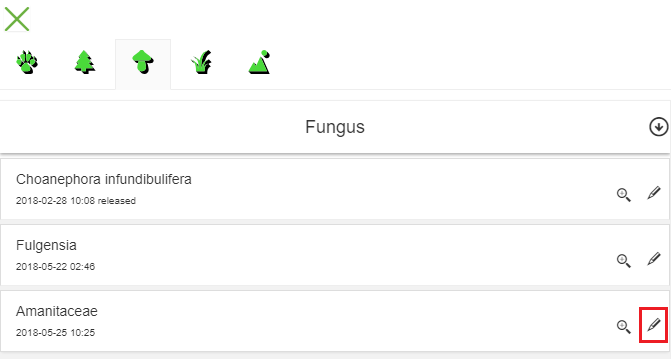
User_002 is a Fungus_Publisher. He decided to check new updates in the portal and log in with his account. Then he will:
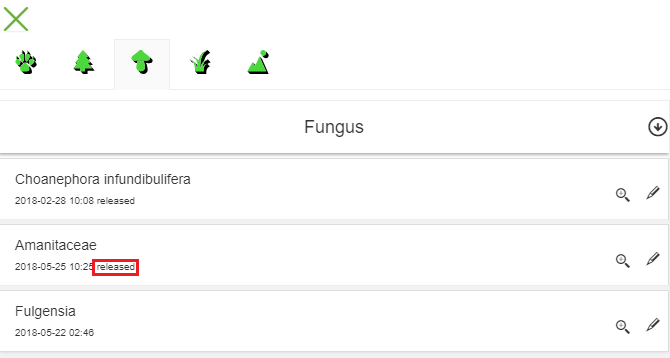
Click the Search button from the top toolbar. Click the Fungus category. A list of fungus features will be shown. He will be able to distinguish the unpublished from the published features having the released note.
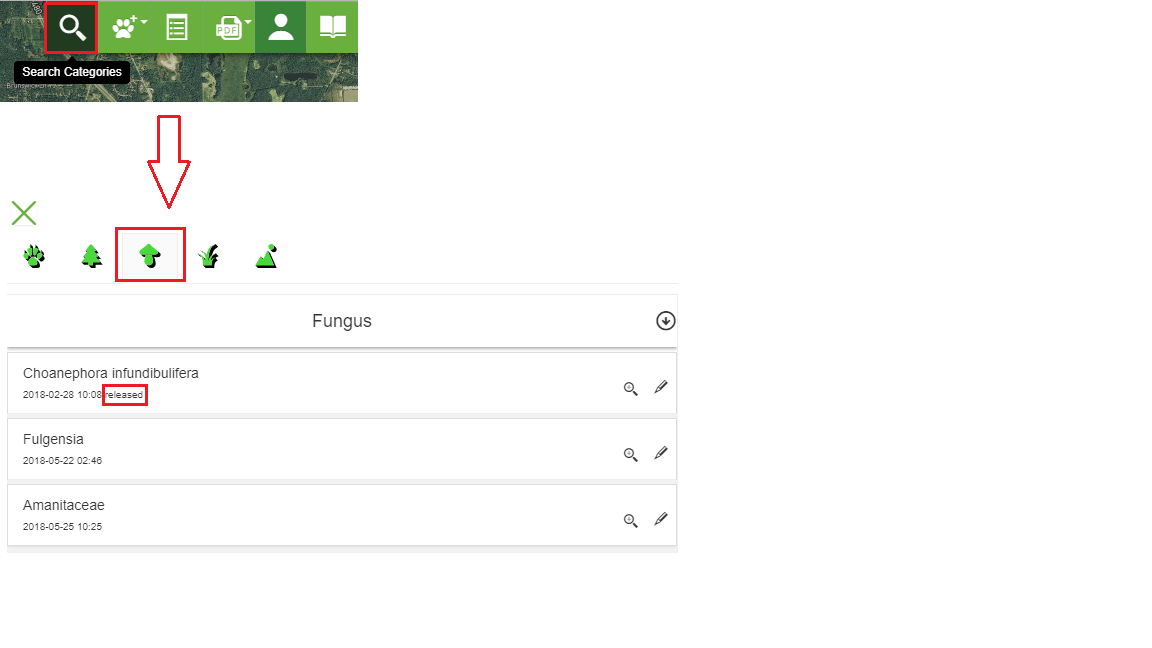
Click on the pencil icon to edit it.
Click on Edit then Navigate to Management page.
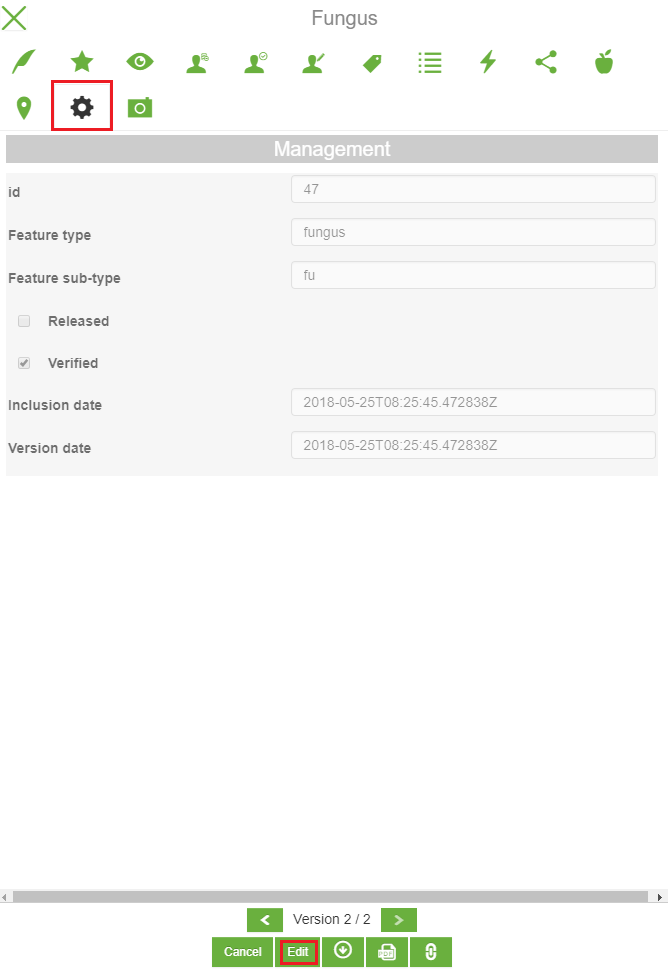
Flag the Released box then Update
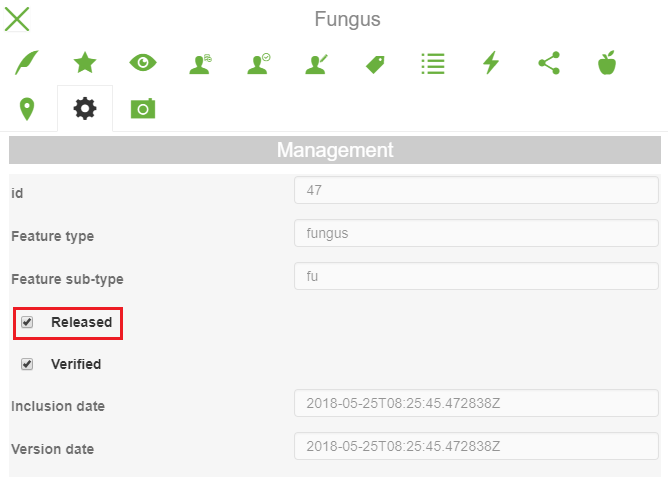
Now the new feature has two versions and only the second one is published and viewable by all users.
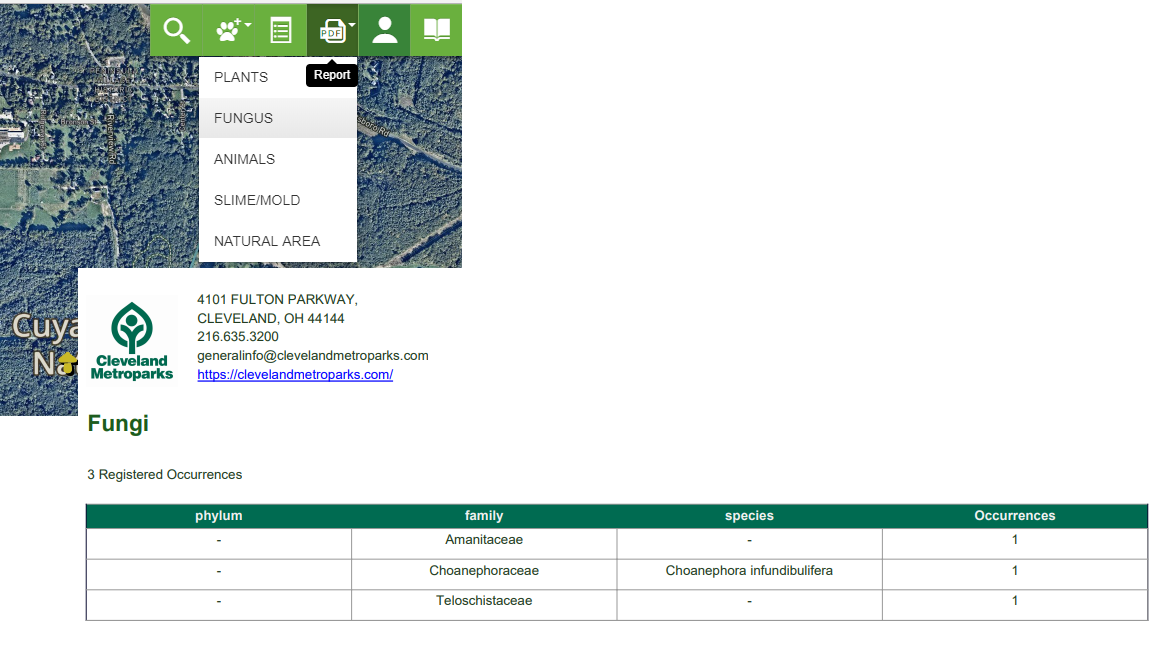
Exporting Data and Generating Reports
At this point, the curious user_003 wants to check again the portal and logs in. He will be able to:
View the last version of the new added feature since that the first version was not released.
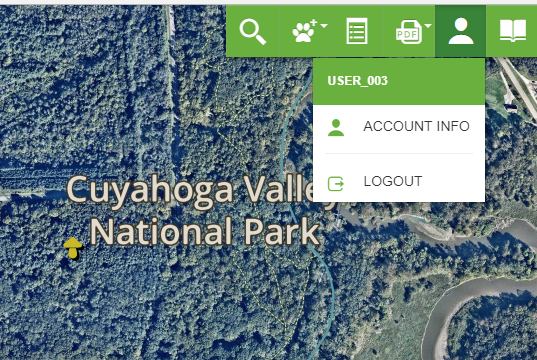
Explore its contents but not to Edit it (the edit button is switched off).
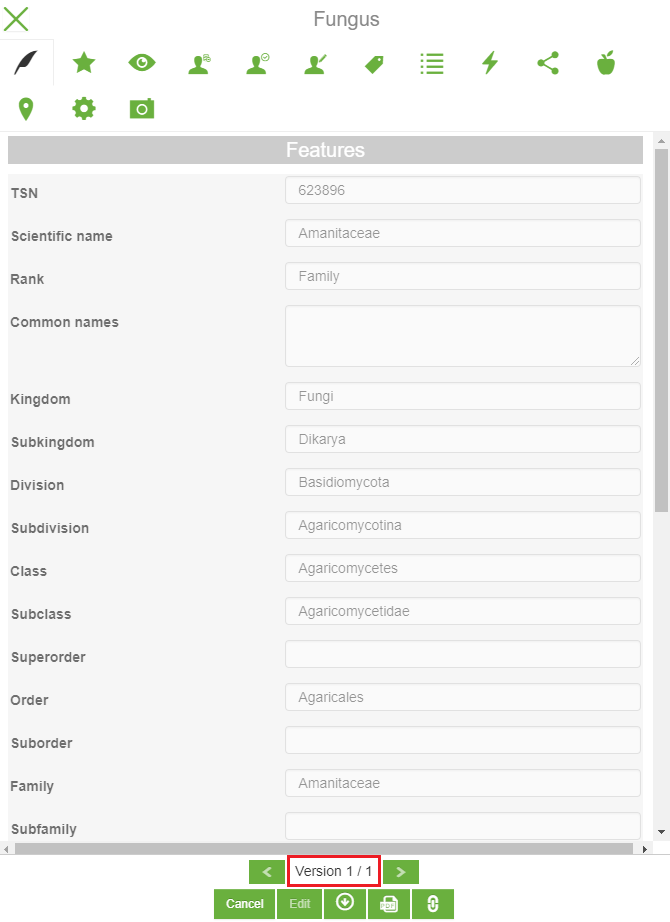
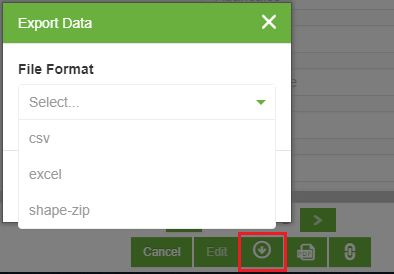
Export the data in csv, excel or zipped shape file formats.
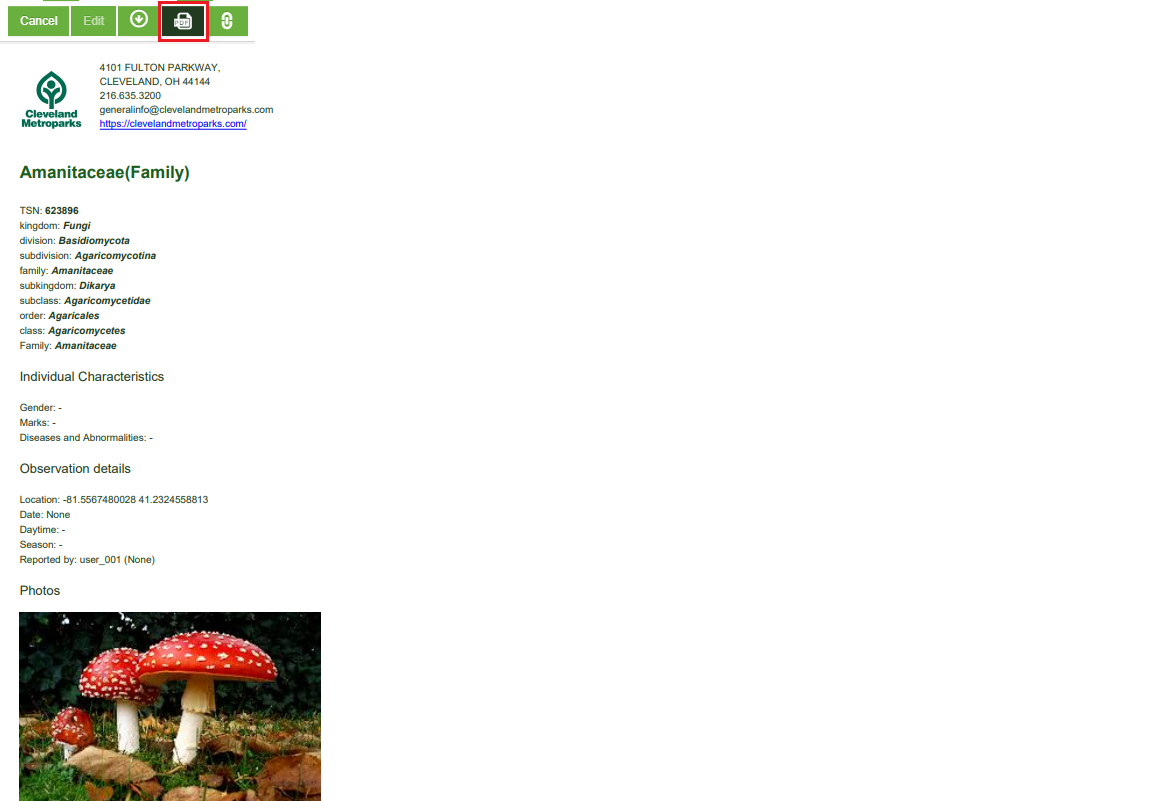
Generate a report for the single feature in Pdf.
Generate a statistical report in Pdf for all the Fungus category.
Note
Non authourized users can not save Permalinks. For example, user_003 cannot save permalinks for Fungus.